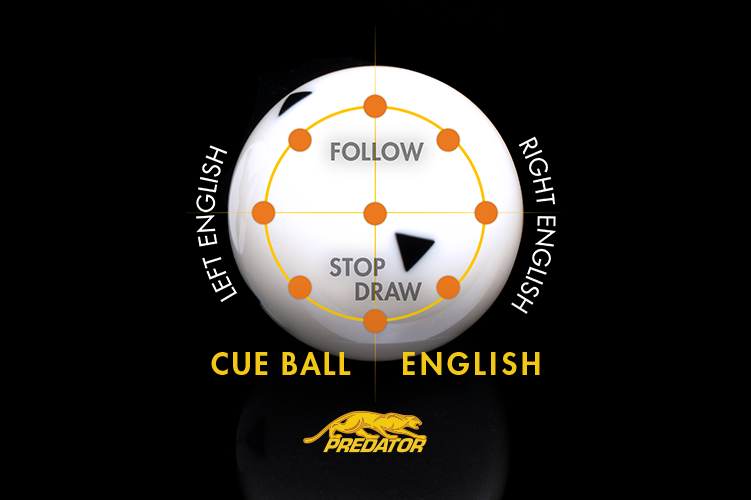
Winning games and playing at a high level requires the ability to control where the cue ball goes and set yourself up in a good position to make a series of shots and run out the rack. Getting a good position or “shape” in pool terms often requires applying English or side spin to control where the cue ball is going.
The vast majority of all shots are missed when English or sidespin is used. The reason is simple: when you use English, the cue ball doesn’t go where you aim it. The cue ball is pushed to the opposite side of where the cue tip hit it. That is called cue ball deflection or squirt and the typical player takes years to learn to compensate for this error factor. The amount of cue ball deflection depends on the cue used, the tip placement and the speed of the stroke. The farther the strike from center, the more the cue ball is deflected off-line. Cue ball deflection will also increase with a faster stroke.
Lower deflecting cues require less compensation and therefore make the game easier. Predator first pioneered low-deflection shafts with spliced Maple shafts over 25 years ago, and more recently with the REVO carbon fiber shafts. Predator shafts are designed to reduce cue ball deflection and are the lowest deflecting shafts on the market. They greatly increase your chances of making your shot when you use English.
Put simply, a low deflection shaft is more accurate and it will help you make progress faster.
With Predator’s minimal deflection, you don’t have to adjust for English as you would with a conventional shaft. The less you have to adjust your aim, the more chance you have to make the ball.
If you are an intermediate or beginner and haven't learned to compensate for cue ball deflection yet, you will make progress almost instantly.
If you are coming from a standard wood shaft, a Predator shaft deflects significantly less than your previous shaft, and you do not have to adjust your aim for deflection as much with your new Predator shaft. For example, if you were used to aiming an inch to the right of your object ball target with your previous shaft to hit it where you intended using right english, you may only need to aim a half-inch to the right with a Predator low-deflection shaft.
As both a player and a teacher, I have learned that more than 50 percent of all shots are missed due to the fact that players don’t know how to adjust for deflection and that’s when they get into the bad habit of avoiding spin. Not using spin will limit their ability to play position and stops them from improving their game.
The key to playing with a Predator shaft is experimenting with different hitting speeds. With either the REVO carbon fiber shafts, or the 314-3 or Z-3 wood shafts, you’re going to feel and see a difference in how the cue ball and object balls react.
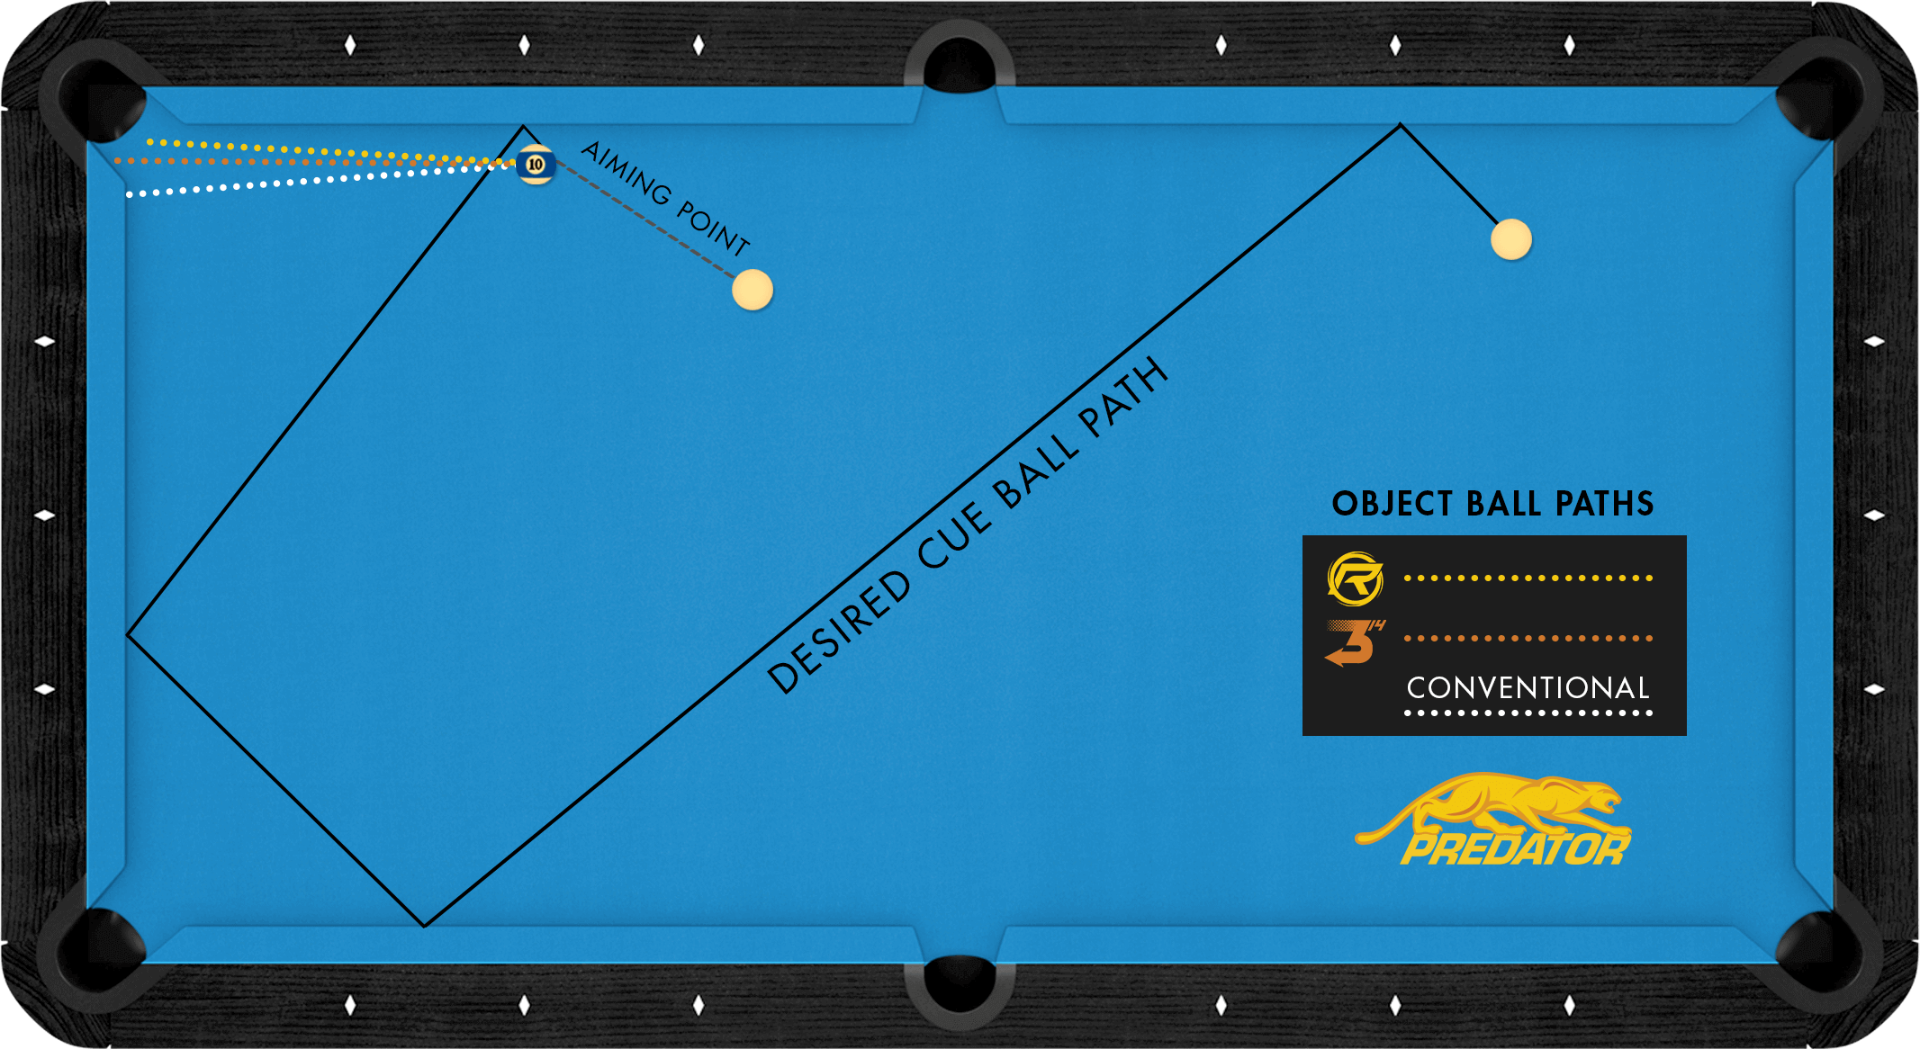
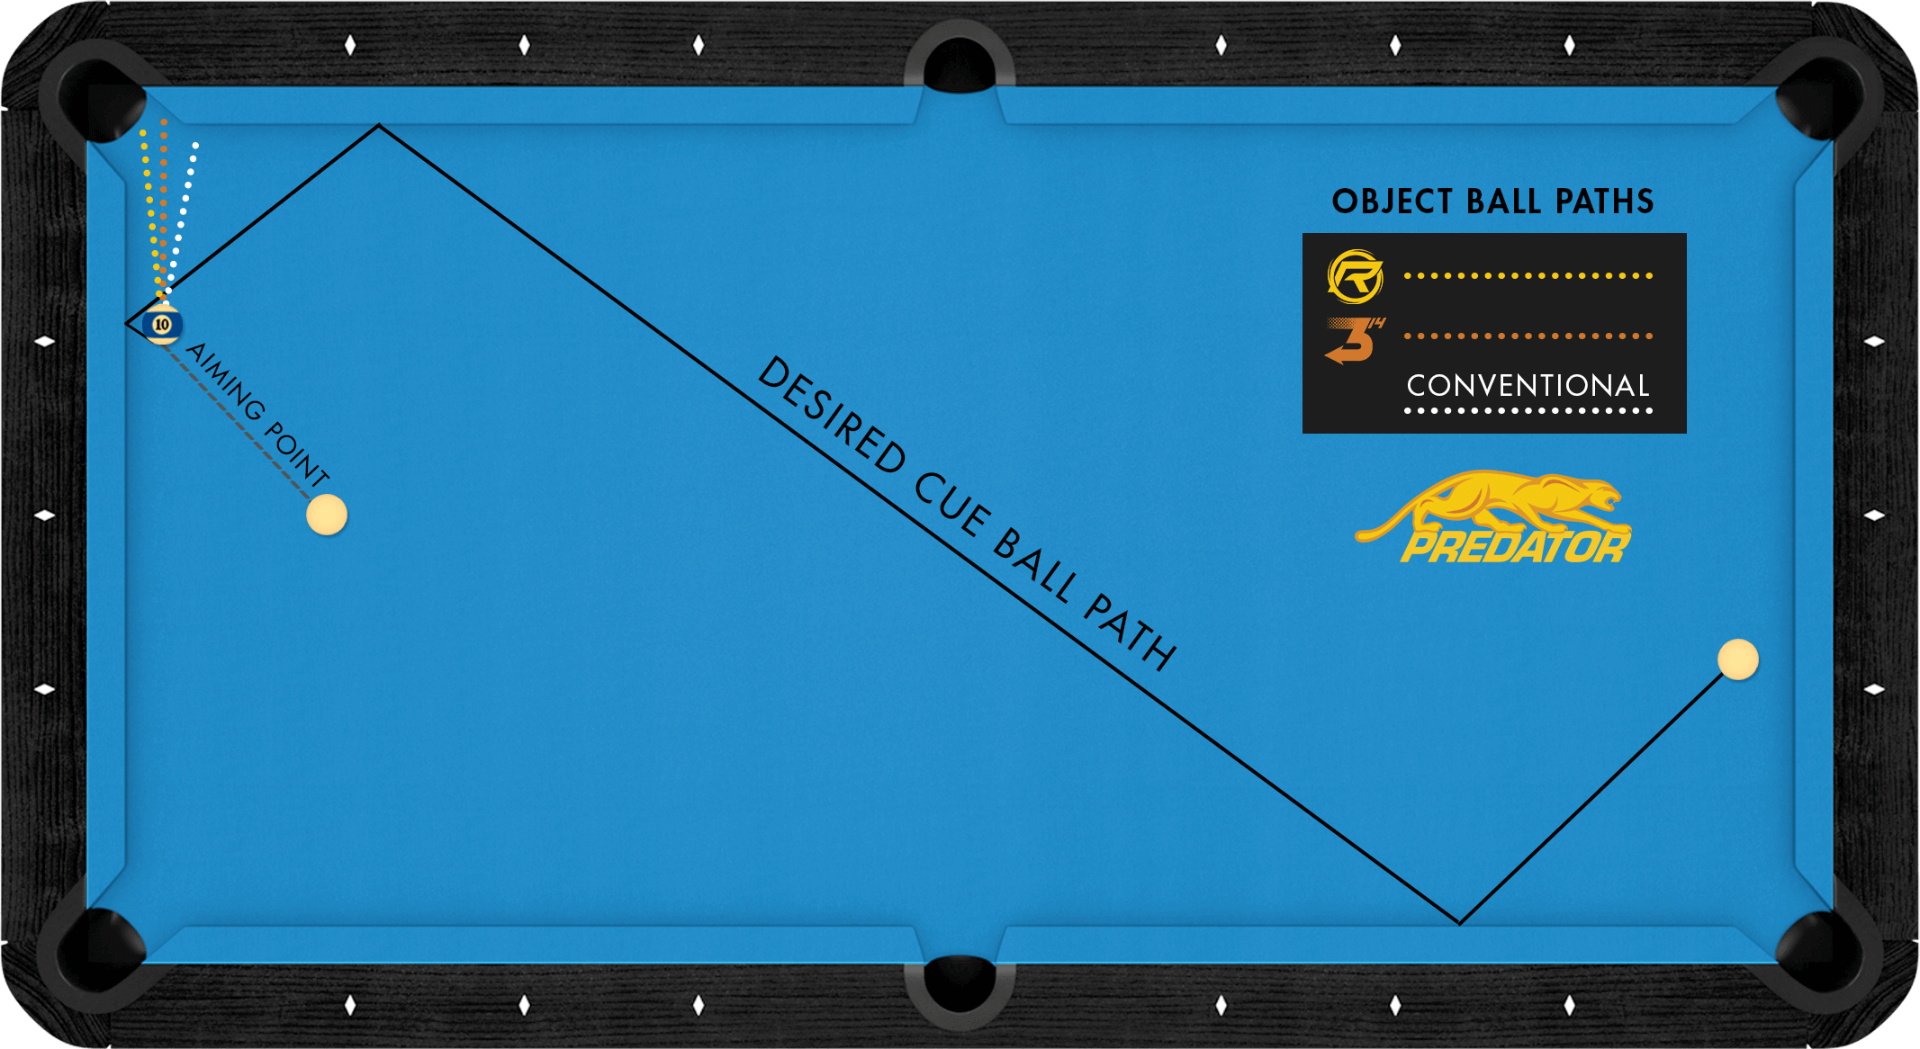
To practice deflection, use the illustrations below to set up your shot. Each depicts the aiming point and the paths the object ball will take with a Z-3 shaft, a 314-3 shaft, and a conventional shaft. Note, the Desired Cue Ball Path shown is approximate and will vary slightly depending on the shaft you’re playing with.
As you improve, practice these shots with different distances between the cue ball and the object ball. Once you get to a five to six foot range, you will need to make an adjustment and aim the object ball closer to the rail by the point of the pocket.

Deflection Drill 1: Aim high left on the cue ball for left english and right deflection.

Deflection Drill 2: Aim high right on the cue ball for right english and left deflection.

Repeat with the opposite English: Do the same drills with the opposite English to get familiar with adjusting for both inside and outside english and see how much you have to adjust.
With these drills, you will quickly learn how little you have to compensate with your Predator product. You will soon realize how Predator will take your game to the next level.
With any shaft, there is an optimal point on the shaft, called the pivot point, where you need to bridge to maximize your accuracy. In simple terms, if you bridge at the correct pivot point for your shaft and your initial set-up alignment is on target, you can actually hit the cue ball off-center and still hit the 1-ball dead center.
At that bridge length, the deflection, or squirt, produced by the shaft will compensate for a stroke that deviated from its original set up or alignment.
Our Revo playing shafts have a pivot point that is around 19", allowing accuracy with a long bridge.
The optimal pivot point on the break is the bridge length that allows you to maximize your speed and gain maximum forgiveness at the same time.
The BK-Rush’s pivot point is around 19″ from the tip end.
The BK3’s pivot point has been tuned between 13″ and 14″ from the tip end.
A majority of strong breakers use a long bridge because it allows them greater acceleration and more powerful breaks. Most break cues have pivot points between 9″ and 11″ and require an extremely accurate stroke when using a longer bridge to generate speed. With pivot points longer than most other break cues, Predator Break cues gives you greater speed, increased accuracy and, much more importantly, a more powerful break.
Predator research has clearly shown that a dime radius (or shape of a dime) will produce 5 percent to 10 percent less cue ball deflection than the more commonly used nickel shape. The cue ball deflection is reduced because the dime radius centralizes the hit to the center, or strong part, of the shaft.
Login and Registration Form